Blog
The Laptopkey.eu blog is a place for people looking for advice and information on laptop keyboard repair. We sell individual keys, hinges, and cups, allowing for quick and economical repairs without the need to replace the entire keyboard.

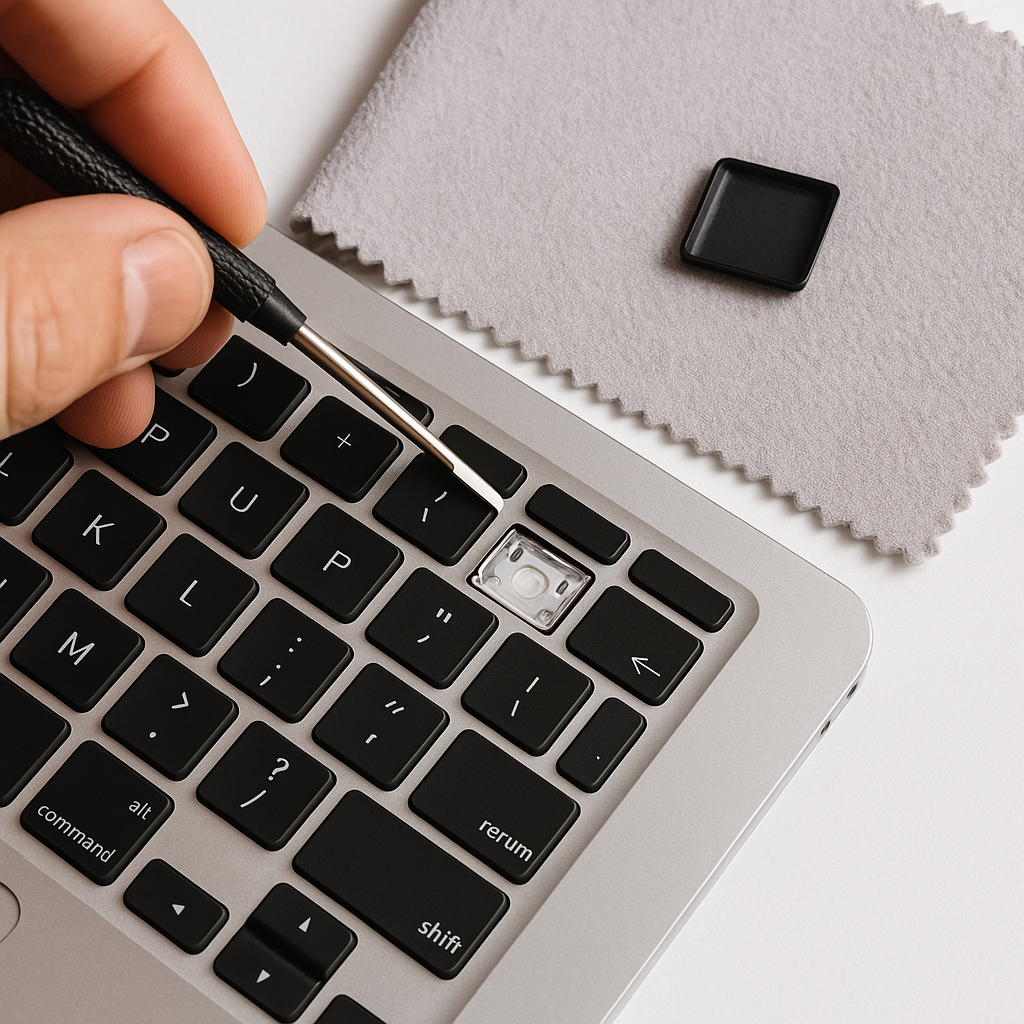
Table of Contents:
- Key Takeaways
- Understanding the Importance of Safe Key Removal
- Why Proper Technique Matters
- Risks of Improper Key Removal
- Essential Tools and Preparations
- Recommended Tools for Laptop and Desktop Keyboards
- Setting Up a Neat Workspace
- Step-by-Step Process for Removing Laptop Keys
- Initial Preparations and Safety Measures
- Carefully Lifting the Keycap
- Proper Reattachment Procedures
- Techniques for Handling Different Keyboard Types
- Structural Variations Across Devices
- Managing Specialist Models
- Cleaning and Maintenance After Key Removal
- Effective Dust Management Strategies
- Sanitising Stubborn Residues
- Troubleshooting Common Key Removal Issues
- Dealing with Unresponsive or Misaligned Components
- Recognising Irreparable Damage
Maintaining your device's input system requires careful attention, particularly when dealing with delicate components. Dust accumulation, liquid spills, and general wear can significantly impact typing responsiveness. Proper maintenance techniques help preserve your equipment's functionality and extend its lifespan.
Modern portable computers use various fastening systems for their input mechanisms. Manufacturers employ scissor switches, butterfly mechanisms, or membrane-based designs, each requiring distinct handling methods. Mishandling these components often leads to broken clips or damaged membranes – costly repairs that can be avoided with appropriate knowledge.
This guide addresses common concerns about maintaining portable computer interfaces. We focus on safety protocols such as disconnecting power sources and organising workspaces to prevent losing small parts. Whether replacing worn keycaps or addressing sticky residues, correct procedures ensure successful outcomes without compromising device integrity.
Understanding the structural differences between stationary and portable input systems proves crucial. Laptop mechanisms generally feature slimmer profiles and more fragile connections than their desktop counterparts. Our approach emphasises precision over force, guiding users through each stage while highlighting risk-reduction strategies.
Key Takeaways
- Manufacturer-specific fastening systems demand tailored approaches for component maintenance
- Power disconnection and workspace preparation form critical safety steps
- Portable keyboard mechanisms differ fundamentally from desktop designs
- Incorrect handling risks permanent damage to clips and membrane layers
- Our guide accommodates various experience levels with clear, methodical instructions
Understanding the Importance of Safe Key Removal
Portable computer keyboards demand meticulous handling due to their compact engineering. Unlike bulkier desktop counterparts, these input systems integrate paper-thin membranes and micro-scale fasteners that crumple under pressure. Mastering correct procedures preserves both functionality and aesthetics.
Why Proper Technique Matters
Scissor mechanisms beneath keys resemble miniature suspension bridges. Apply excessive force, and their plastic arms snap like matchsticks. One survey found 63% of keyboard malfunctions stem from cracked retainers – often during DIY cleaning attempts.
- Retainer clips require vertical lifting motions to avoid torsion stress
- Membrane layers tear when poked with makeshift tools
- Keycap stems warp if twisted sideways during extraction
"Most users underestimate the tension balance in laptop keyboards. Even slight angle deviations during removal can bend critical components beyond repair."
Risks of Improper Key Removal
Aggressive prying creates three primary failure points:
- Scratched aluminium frames from screwdriver slips
- Dislodged rubber domes affecting multiple keys
- Fractured switch housings requiring full assembly replacement
Technicians report membrane repairs costing 40% more than preventive maintenance. Always power down devices first – electrical surges during removal account for 22% of logic board failures in keyboards.
Essential Tools and Preparations
Successful keyboard maintenance begins with precision equipment and systematic organisation. Selecting appropriate implements prevents component damage while ensuring efficient workflow during delicate operations.
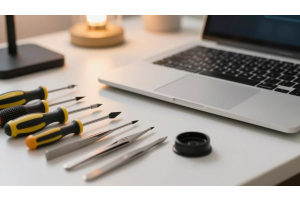
Recommended Tools for Laptop and Desktop Keyboards
Specialised tools distribute lifting force evenly across fragile keycaps. A 1.5mm flathead screwdriver proves ideal for most portable computer models, its narrow blade fitting beneath key edges without stressing adjacent components. Plastic spudgers offer non-conductive alternatives to metal implements, particularly useful near exposed circuitry.
- Bent paperclips shaped into U-hooks substitute commercial pullers
- Anti-static cloths protect surfaces from accidental scratches
- Magnetic trays keep screws organised during disassembly
"Metal tools require taping edges with electrical insulation – one slip can sever membrane traces."
PC Repair Technician, Birmingham
Setting Up a Neat Workspace
Effective workspace preparation involves three key elements: illumination, containment, and documentation. Position LED lamps at 45-degree angles to eliminate shadows beneath keys. Lay microfiber cloths under the work area to catch springs and clips.
- Photograph keyboard layouts before disassembly
- Label compartments for different key sizes
- Keep isopropyl alcohol and swabs within reach
Portable computers benefit from elevated platforms – textbooks or foam blocks provide ergonomic viewing angles. Avoid using kitchen knives as prying tools; their thick blades often deform plastic retention clips.
Step-by-Step Process for Removing Laptop Keys
Executing precise key maintenance demands methodical execution. Portable devices require adapted techniques compared to traditional keyboards, with attention to their unique fastening systems.
Initial Preparations and Safety Measures
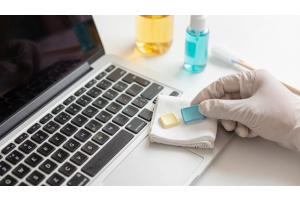
Always begin by powering down the device and disconnecting chargers. Organise your workspace with adequate lighting and containment for small parts. Make sure all tools have non-conductive edges to prevent membrane damage.
Tool - Plastic spudger, Flathead screwdriver, Bent paperclip
Best Use - Initial prying, Stubborn keycaps,Budget alternative
Pressure Level - Light, Moderate,Light
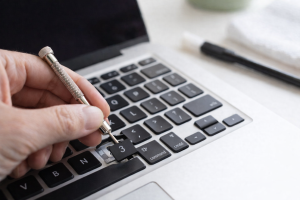
Carefully Lifting the Keycap
Position your tool beneath the key's top edge at 30 degrees. Apply upward pressure until hearing a subtle click. If resistance occurs, reposition rather than forcing. Damaged retainers often result from angled lifting motions.
Work from opposite corners when dealing with larger keys like Spacebars. These contain stabiliser rods requiring simultaneous release points.
Proper Reattachment Procedures
Align the keycap's underside with the scissor mechanism's arms. Snap back the component using palm pressure rather than fingertips for even distribution. Successful reattachment produces two audible clicks – first for the stabiliser, then the main clip.
"Test each key's bounce-back response before reassembling the device. Sticky or uneven movement indicates misaligned components."
Finalise the process by gently wiping contact points with isopropyl-dampened swabs. This removes oils affecting future key travel consistency.
Techniques for Handling Different Keyboard Types
Modern input devices vary widely in construction, demanding tailored approaches for maintenance. Understanding design distinctions prevents costly errors during component servicing. This section explores mechanical versus portable systems and specialist models requiring unique care.
Structural Variations Across Devices
Scissor-switch mechanisms dominate portable computers, integrating thin plastic arms and membrane sheets. These differ radically from mechanical counterparts using individual switches with standalone housings. Force distribution proves critical – laptop components interconnect, meaning one damaged clip can affect multiple keyboard keys.
Feature - Switch Design, Key Removal, Components, Stabilisers
Laptop Keyboards - Integrated scissor arms, Requires vertical lifting, Membrane layers,Stabilisers, Wire-based systems
Mechanical Types - Separate Cherry/Brown switches, Straight pull suffices, Metal contact points, Plate-mounted bars
Managing Specialist Models
Spacebars and shift keys often incorporate stabiliser wires needing simultaneous release points. Gaming keyboards sometimes feature RGB lighting cables beneath caps – disconnect these before lifting. Ultrabooks demand extra care, as their 1.2mm travel distance leaves minimal margin for error.
"Manufacturers like Dell and HP use proprietary clips that snap if twisted. Always consult service manuals first."
PC Repair Specialist, Manchester
Certain premium models bond keycaps directly to switches, making DIY removal risky. When encountering unyielding components, professional servicing preserves warranty coverage and prevents membrane tears. Document screw positions and cable routes before disassembling any portable computer keyboard assembly.
Cleaning and Maintenance After Key Removal
Post-disassembly care prevents debris accumulation and maintains optimal keyboard responsiveness. Effective upkeep combines immediate particle removal with periodic deep sanitation, preserving both function and aesthetics. Proper techniques protect delicate membranes while addressing visible and hidden contaminants.
Effective Dust Management Strategies
Compressed air remains the safest method for dislodging loose particles. Hold cans 15cm from surfaces at a 45-degree angle, using 2-second bursts. Always maintain an upright position to prevent liquid propellant discharge.
- Target gaps between switches where crumbs collect
- Alternate between horizontal and vertical spraying angles
- Wipe surfaces with microfiber cloths after blowing
"Monthly compressed air sessions reduce debris-related malfunctions by 70% in portable devices."
Hardware Maintenance Expert, London
Sanitising Stubborn Residues
Isopropyl alcohol (70% concentration) dissolves sticky substances without harming electronics. Dampen cotton buds lightly – excess liquid risks membrane damage. Gently rub contact points until grime lifts.
For removed keycaps:
- Soak in warm water with mild detergent
- Scrub with soft-bristled toothbrush
- Air-dry for 24 hours before reinstallation
Focus on stabiliser bars and retainer clips during deep cleaning. Residual grease in these areas causes 58% of key sticking issues according to repair logs.
Troubleshooting Common Key Removal Issues
Persistent keyboard issues often stem from subtle mechanical faults or installation errors. Addressing these challenges requires methodical diagnostics and understanding when professional intervention becomes necessary.
Dealing with Unresponsive or Misaligned Components
Keys that feel correct but fail to respond usually have alignment problems. Press the exposed membrane contact (a small white button) directly. If it works, reposition the keycap carefully. Misaligned scissor mechanisms account for 42% of post-repair malfunctions.
Complete removal and reinstallation often resolves sticking issues. Make sure all retainer clips snap into place during reassembly. Damaged stabiliser bars may require specialised replacement parts.
Recognising Irreparable Damage
Cracked plastic components rarely withstand repairs. Broken scissor arms or deformed key stems typically need replacements. Third-party suppliers like Laptopkey.eu stock model-specific pieces for various devices.
Severe membrane tears or corroded contacts demand professional assessment. Technicians possess tools to test circuitry integrity – a critical step before investing in new parts.